Description
Clap Switch Using Arduino Atmega328
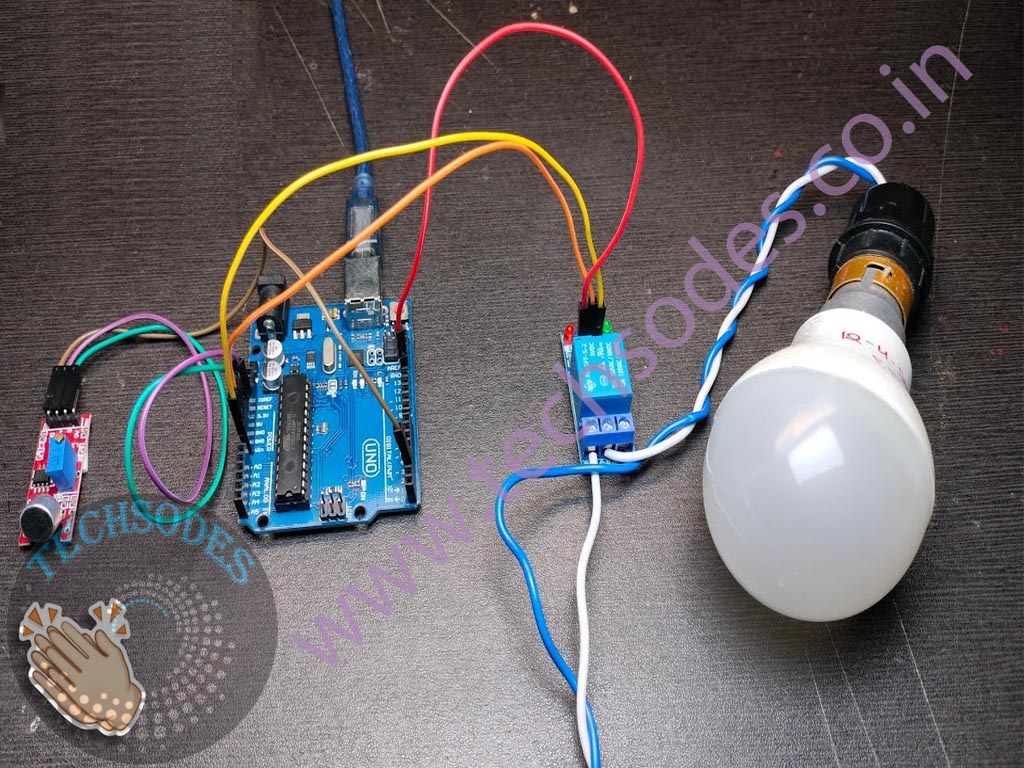
A clap switch is a simple yet fascinating project that allows you to turn electrical appliances on or off by simply clapping your hands. In this project, we will build a clap switch using an Arduino ATmega328, a relay module, a microphone (mic) module, a holder, and a 220V AC bulb. This project not only showcases how sound can be used to control appliances but also demonstrates the practical use of Arduino in home automation systems.
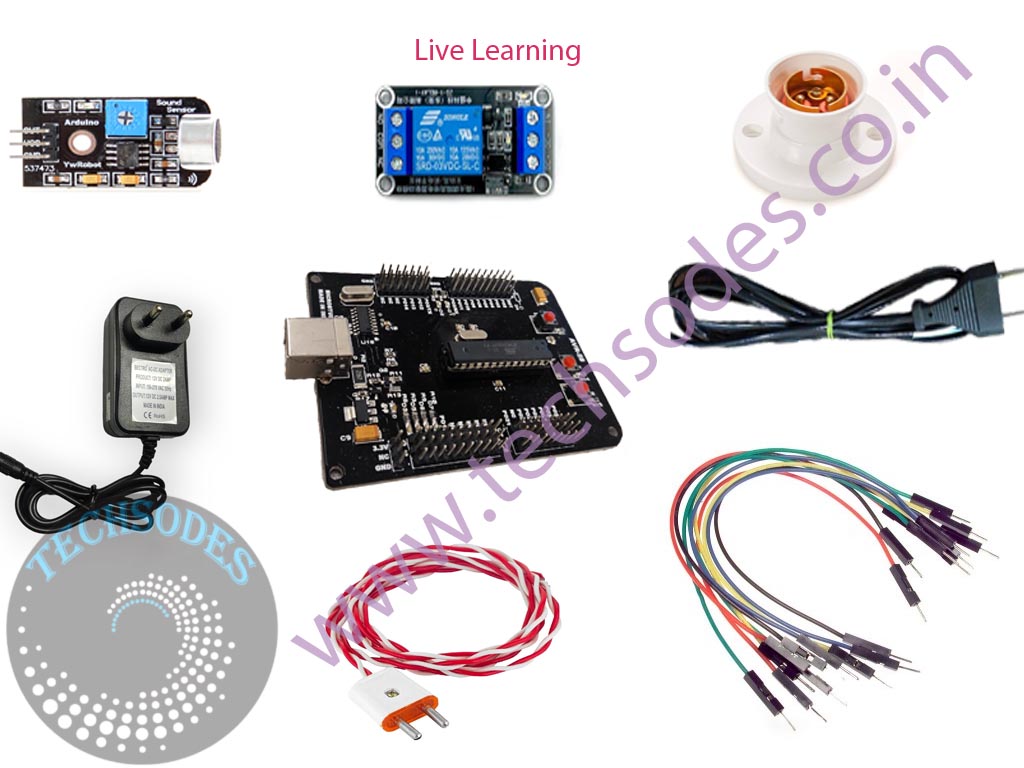
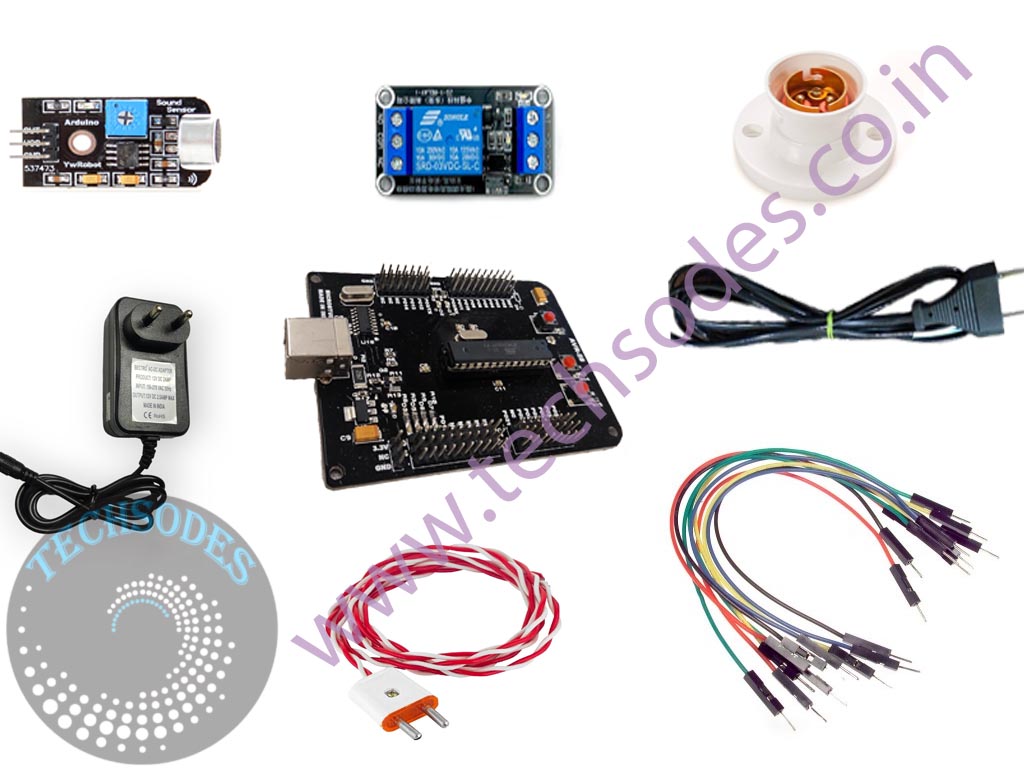
Components Used in the Clap Switch Project
1. Arduino ATmega328: The central controller of the system. It processes the signals from the microphone module and sends commands to the relay module to control the bulb.
2. Relay Module: A crucial component that helps to isolate the low-power circuit from the high-voltage circuit. It acts as a switch, allowing the Arduino to control the AC appliance (in this case, the bulb).
3. Microphone Module: This module detects sound, particularly the clapping noise, and converts it into an electrical signal. The microphone module is the input sensor for this project.
4. 12V Adapter: Used to power the Arduino board. However, if a 12V adapter is not available, the Arduino can also be powered through a USB cable connected to a mobile phone charger.
5. 220V AC Bulb and Holder: These represent the appliance that will be controlled by the clap switch.
Working Principle of Clap Switch
The fundamental idea behind the clap switch is to detect sound (clapping) and use that sound signal to trigger a relay, which controls the 220V AC bulb. The microphone module captures the sound, converts it into an electrical signal, and sends this signal to the Arduino. The Arduino processes this signal and determines whether the sound corresponds to a clap. If it detects a clap, the Arduino triggers the relay module, which in turn switches the bulb on or off.
Power Supply Considerations
The Arduino ATmega328 can be powered either by a 12V adapter or through a USB cable connected to a mobile phone charger. If you don’t have a 12V adapter, using a USB cable is a practical and convenient option. The Arduino will receive a stable 5V from the mobile charger, which is sufficient to run the board, microphone module, and relay.
How the Clap Switch Works
1. When the system is powered on, the microphone module listens for sound in the environment. As soon as a clap is detected, it sends an electrical signal to the Arduino.
2. The Arduino processes the signal and checks if the sound exceeds the predefined threshold (which we’ve set for a clap). If the sound matches a clap, the relay is toggled.
3. The relay acts as a switch for the 220V AC circuit that controls the bulb. When the relay is activated, the circuit closes, and the bulb turns on. When the relay is deactivated, the circuit opens, and the bulb turns off.
4. Each clap toggles the state of the relay, allowing you to switch the bulb on or off with a clap.
Applications and Uses of Clap Switch
Home Automation: This simple clap switch can be integrated into a home automation system to control lights or other electrical appliances.
Accessibility: Clap switches can be very useful for people with mobility issues, allowing them to control appliances without needing to physically press a button.
Fun DIY Project: It’s a great beginner project for anyone interested in electronics and Arduino programming, offering a hands-on experience with sound detection and relay control.
Conclusion of Clap Switch
Building a clap switch using Arduino ATmega328 is a rewarding project that combines sound detection and relay switching to control an AC appliance. Whether you’re looking to automate your home or just want to explore Arduino projects, this clap switch is a fantastic way to get started. With simple components like a microphone module, relay module, and a few lines of code, you can create a functional device that turns appliances on or off with the sound of a clap.





wynastyrahul –
i know their work from long time ago . they are genuine i can assure that nobody can give you quality like that. I asked them to make a clap switch project for me urgently then in just 4-5 days they delivered the project they also provide all the documentation that will help you to make your project file .